ALWAYS check fit before you order.
Corrugation dimensions can vary in shipping containers.
Reasons to use Inserts
The InSoFast panels and inserts are designed for the most common shipping container corrugations. Inserts are the best solution for the containers listed below:
- Containers that are older often have different corrugation dimensions.
- Containers with swing doors on both ends often have different weld seam dimensions.
- Small 10’ long containers
- Dented older container (vintage condition)
The pros and cons of the insert only application
Method install locally sourced flat board stock insulation over the container’s exposed metal surfaces.
- CON: Using just inserts in the corrugations will still leave the exposed ribs uninsulated.
- See: Like Frying Pans
- PRO: An inexpensive method when modifying older containers with dings and dents to prevent condensation in the corrugations.
- PRO: An easier installation when working with dings and dents of some containers.
- PRO: A fast track application for industrial projects that are generally used for storage.
- CON: Check with local code restrictions for exposed foam insulation fire requirements.
- CON: Extra work. Traditional framing, wood or steel studs, would need to be installed with drywall and optional additional insulation in order to make the container into a habitable space.
Three step process to insulate a shipping container sidewall
If you just need to just insulate a shipping container for storage, and covering the insulation for fire safety and protection is not a concern, we recommend the InSoFast family of inserts. Inserts are used to infill the container’s corrugated voids to prevent hidden condensation. This method using flat stock foam panels and inserts becomes a three-step process:
- Apply the Inserts to infill the wall’s corrugated voids preventing hidden condensation.
- Then attach the locally sourced (48″ x 96″) flat stock sheet insulation over the inserts completing the continuous thermal layer.
- Finally build the traditional interior framing and then the services and finishes can be installed.
This is the least expensive method available for materials. However, this method greatly increases the costs for labor and onsite coordination. The installation process is more complex.
If you just need to insulate a shipping container for storage, we recommend the InSoFast family of inserts.
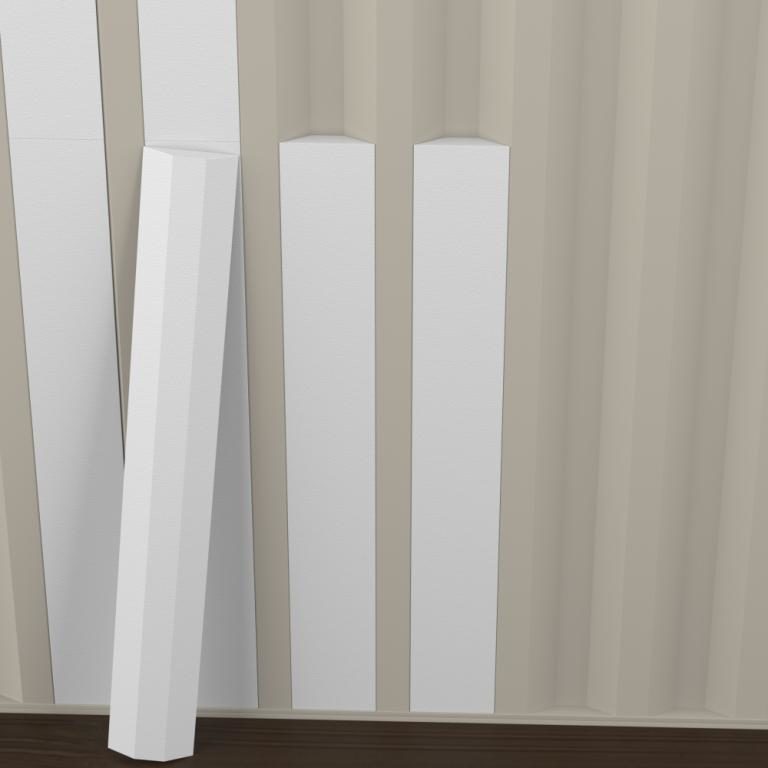
Side Wall Inserts
InSerts custom designed to fit the depths of the container’s side corrugated walls, minimizing hidden air spaces.
Properties
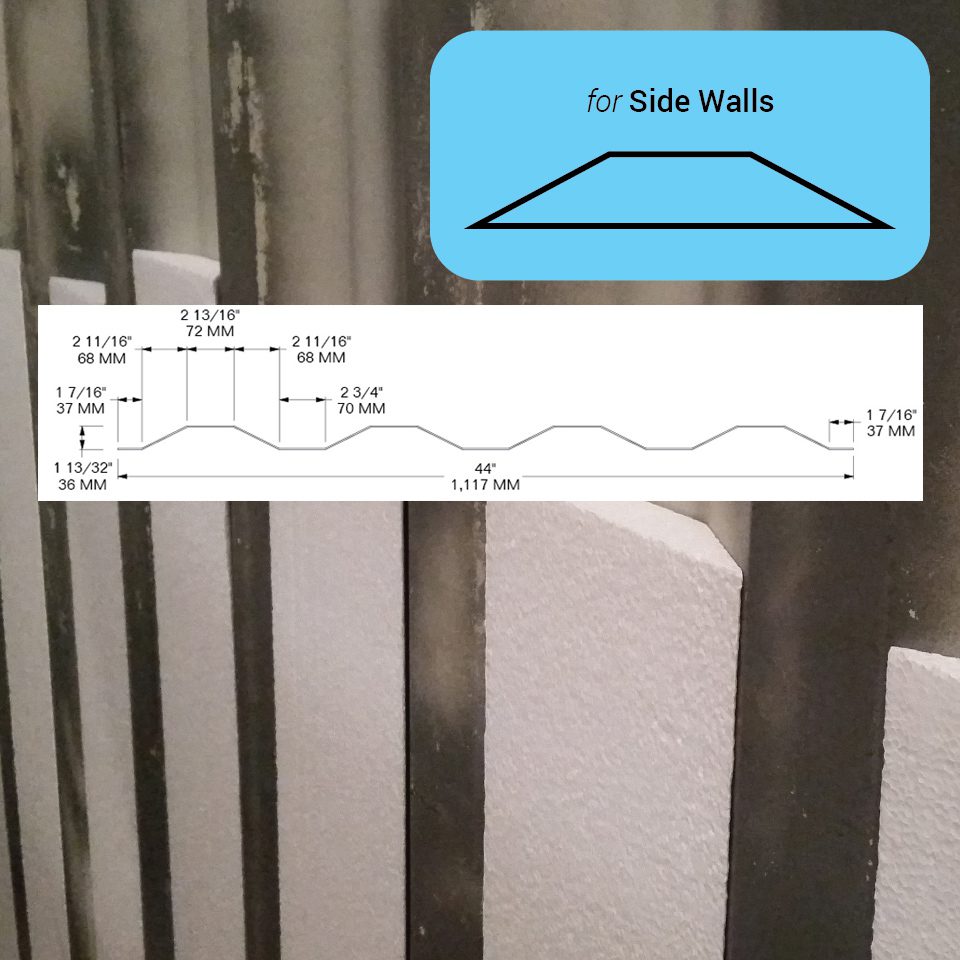 | |
| Side Wall InSsertsOne box of Side Wall Inserts covers 112 Lineal feet of corrugation. | |
| Sidewall Insert Design Details | zip file |
| Dimensions | 48in x 7 3/4in x 1 1/4 in |
| Coverage | 2.5 sq-ft |
| R-Value ASTM C518 | R-5.3 |
| Closed-Cell, injection-molded EPS | ASTM C578 Type II |
| Canadian Standards | CAN/ULC S701 Type 2 |
| Foam Density | 1.0 lbs per cubic foot |
Applications
| Side Walls infill | √ |
| Exterior | √ |
| Interior | √ |
| Shipping Containers | √ |
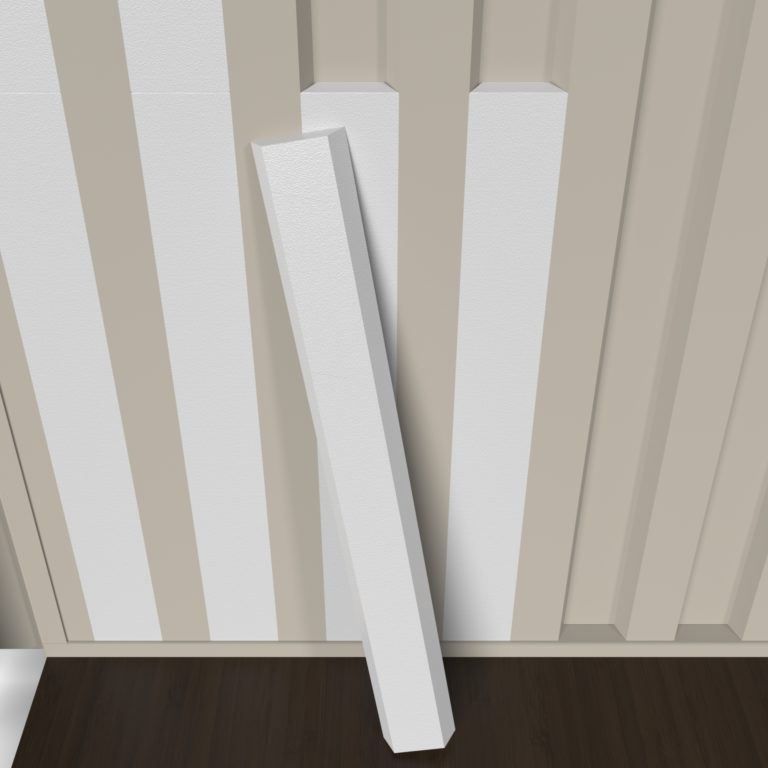
Endwall Inserts
InSerts custom designed to fit the depths of the container’s end wall corrugations, minimizing hidden air spaces.
Properties
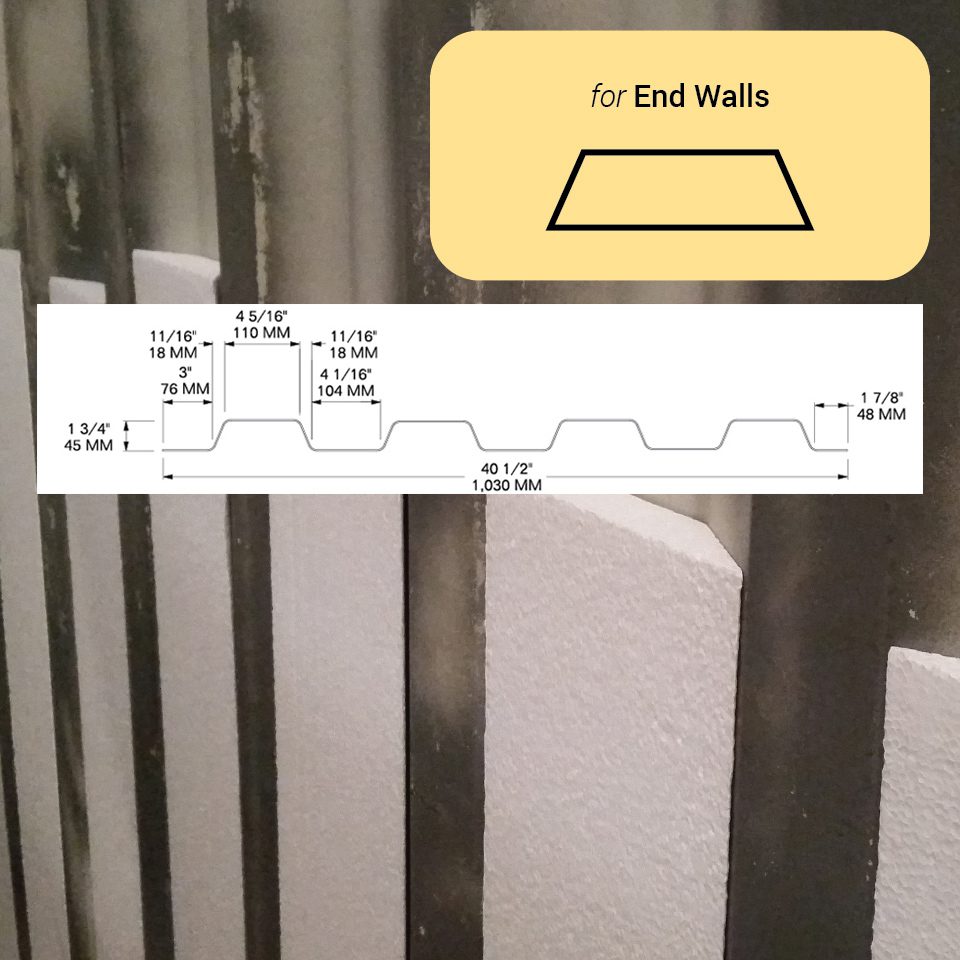 | |
| Endwall InsertsEnd Wall Inserts or the container’s nose corrugation. One box of Inserts covers the end wall. | |
| Endwall Insert Dimensions | zip file |
| Dimensions Diagram | 5 1/4 in × 48in × 1 5/8 in |
| Coverage per pcs | 1.75 sq-ft |
| R-Value ASTM C518 | R-4 per in |
| ASTM C578 Type II | Closed-Cell, injection-molded EPS |
| Canadian Standard | CAN/ULC S701 Type 2 |
| Foam Density | 1 lbs per cubic foot |
Applications
| Side Walls infill | √ |
| Exterior | √ |
| Interior | √ |
| Shipping Containers | √ |
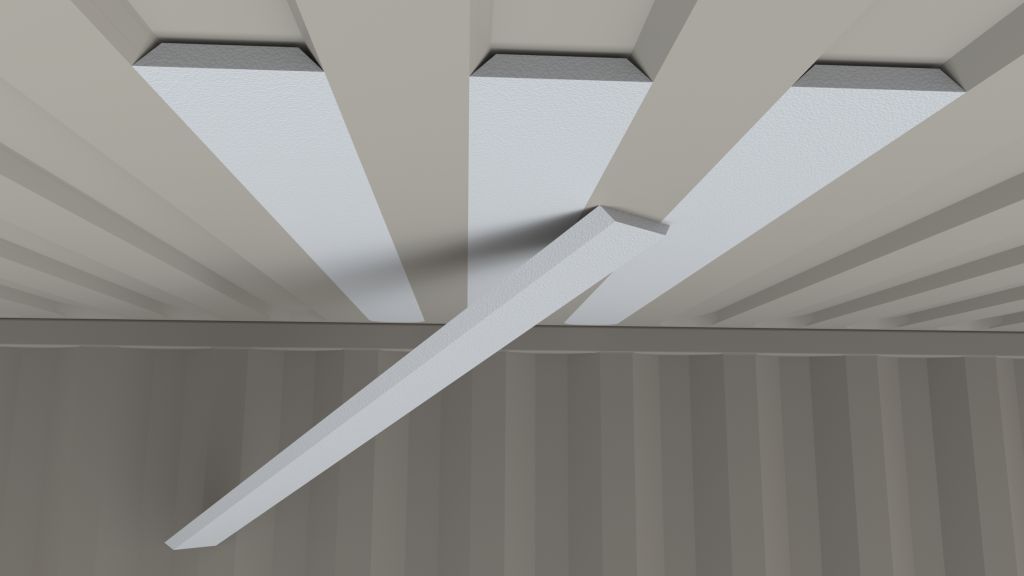
Ceiling Inserts
Inserts custom designed to fit the depths of the container’s ceiling corrugations, minimizing hidden air spaces. There are 56 Ceiling Inserts per box.
Properties
 One box of Ceiling Inserts covers 224 Lineal feet of indents. One box of Ceiling Inserts covers 224 Lineal feet of indents. | |
| Dimensions | 48in x 4 5/8in x 13/16 in |
| Coverage | 1.7 sq-ft |
| R-Value ASTM C518 | R-3.18 |
| ASTM C578 Type II | Closed-Cell, injection-molded EPS |
| Canadian Standard CAN/ULC S701 Type 2 | |
| Foam Density | 1 lbs per cubic foot |
Applications
| Ceiling infill | √ |
| Interior | √ |
| Shipping Containers | √ |
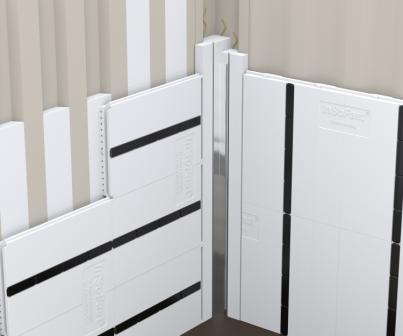
Corner Post (I-EWCP-ST)
corner post inserts infill the corner’s corrugated voids preventing hidden condensation. The Metal “M” angle provides a solid corner stud for finishes like drywall.
Properties
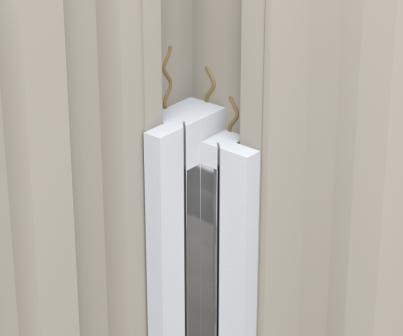 | |
| (I-EWCP) = 1 End Wall Corner Inserts – interior applicationEnd Wall corner Inserts or the container’s nose corrugation. One box of Inserts covers the end wall. | |
| Dimensions | 5 1/4 in × 45 1/4in × 1 5/8 in |
| Corner Post Submittal | |
| Coverage per boxed unit | Both sets of the inside corners |
| One Box – 8 pcs foam inserts | (covers inside corners) |
| Interior side of exposed foam the end wall | 2 in thick |
| Inside Metal Corner | (covers inside corners) |
| Inside fastening width and length | 1 3/4 in x 1 3/4in x 45 1/4in |
| R-Value ASTM C518 | R-4.5 per in |
| ASTM C578 Type II | Closed-Cell, injection-molded EPS |
| Canadian Standard CAN/ULC S701 Type 2 | |
| Foam Density | 1.5 lbs per cubic foot |
| Interiors | √ |
| Shipping Containers | √ |
Applications
| Interior | √ |
| Shipping Containers | √ |
Container Inserts Installation
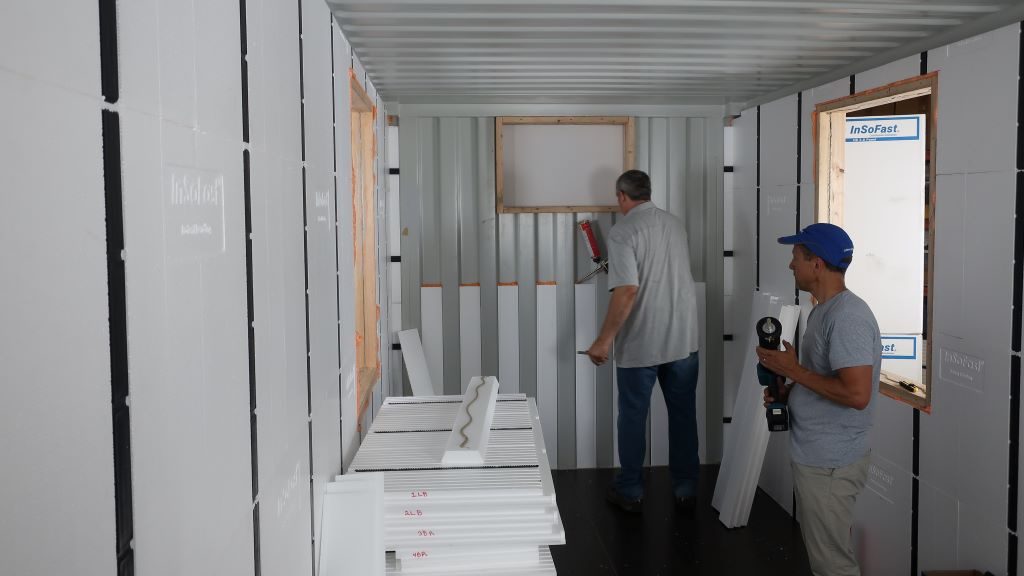
Container InSerts are a specifically shaped sleeve of EPS foam designed to fill the inset corrugation of a shipping container. They are intended to be used in conjunction with InSoFast Panels to achieve maximum insulation and air-tightness in minimum space. InSerts can be adhered directly to the metal with PL Premium 3X.
Guide
Surface Preparation
Ensure all surfaces are clean of any debris, dust, loose paint, etc before installing panels with PL Premium 3X adhesive. PL Premium 3X can span gaps up to 3/8″ and larger gaps can be backfilled with spray foam. These methods can help solidify an installation over dented areas of a container, however, it is best to start with as much surface contact as possible. If your container has large dented areas, we recommend hammering them as smooth as possible before your installing InSoFast products.
PL Premium 3X Construction Adhesive
We have tested and recommend PL Premium 3X Construction Adhesive. Other formulas and brands may not work as expected. Please ensure adequate time for the adhesive to set and cure before attaching finished materials such as drywall and cabinets. PL Premium is a moisture-cured glue. Under dry conditions with low relative humidity, the adhesive may have trouble setting. As plastic and steel have very low moisture retention, you may want to lightly mist the panel with a spray bottle of water to expedite the curing process. Do not over-mist the panels. It may be necessary to brace panels and inserts against the wall while the adhesive sets.
Installing InSerts
Install InSerts before panels. Run a bead of PL Premium 3X adhesive along the length of the InSert and press into the inset space of the shipping container’s corrugated wall. You can use duct tape to hold the InSerts in place until the adhesive has set or until you are ready to install InSoFast panels.
Ceiling Attachment
Install panels on the ceiling before installing along the walls. This way the ceiling panels will sit on top of the wall panels where they meet, adding additional bracing support for the ceiling. The same concept should be applied to finish materials such as drywall. You can increase the holding power of a ceiling by backfilling cavities with a small amount of spray foam adhesive in addition to running PL Premium 3X along the studs. We recommend using a professional applicator gun for a controlled flow of spray foam. Warehouse Bay Corporation is a good place to purchase these materials. Brace panels firmly until all adhesives have cured.
Installing Panels
We recommend installing panels with the embedded studs running perpendicular to a shipping containers corrugated ridges. The goal is to provide as much contact between the studs and steel in order to maximize the holding power of the studs. On the back of the panel, run a 3/8″ bead of adhesive along dove-tailed ribbing of each stud. You can run an additional bead of adhesive along the foam body of the panel in sections that will contact the container or in a general zig-zag pattern.
- Set the first panel in a corner with studs running perpendicular to the direction of the corrugation.
- Cut the second panel along one of the marked cutting lines and use a section to begin the second “column” along your wall. The other section can be used for the same function later on the wall.
- Complete the first two columns sequentially with panels. Cut as needed.
- Repeat the previous steps creating staggered panels to complete as many columns as required.
Preventing Moisture Issues
Metal is thermally conductive. Do not penetrate the steel walls of your container with screws or fasteners. This compromises the continuous seal and can introduce moisture-related issues. Use an expanding spray foam to completely seal any gaps and cracks around the panels such as near doors and windows, along the top and bottom of the walls, or around outlets.
Indoor Air Quality (IAQ)
A shipping container is almost inherently airtight due to its materials and construction. We recommend maintaining these qualities in your design because it will result in a highly energy efficient home. However, in order to be done properly and maintain indoor air quality, your mechanical equipment (HVAC) must be designed specifically to adjust for fresh air circulation.
Learn More:


